SharkTrack documentation
Annotation Pipeline
How to review SharkTrack output and compute species-specific MaxN metrics from detection data.
Overview
After running SharkTrack on your videos, you’ll do two things: review the output and then compute MaxN.
- Review (clean + label), delete false detections and label true detections with a species ID.
- Compute MaxN, generate species-specific MaxN metrics from your reviewed output.
Haven’t run SharkTrack yet? Start with Step 1: Automatic Processing.
Understand the output
TL;DR: SharkTrack groups consecutive detections of the same animal into a track (with an ID). For each track, it saves one screenshot (
.jpg) you can review quickly. Your labels (via filenames) drive the MaxN computation.
Output folder structure
The default output directory is ./output. It contains:
| File / Folder | Description |
|---|---|
internal_results/output.csv | Raw detections (per frame / time) |
internal_results/overview.csv | Summary per video (number of tracks found) |
internal_results/*/ | One subfolder per video |
internal_results/*/<track_id>.jpg | One screenshot per track, this is what you review |
How to read a detection screenshot
In each video folder you’ll see one screenshot per track, with a bounding box around the shark or ray to label.
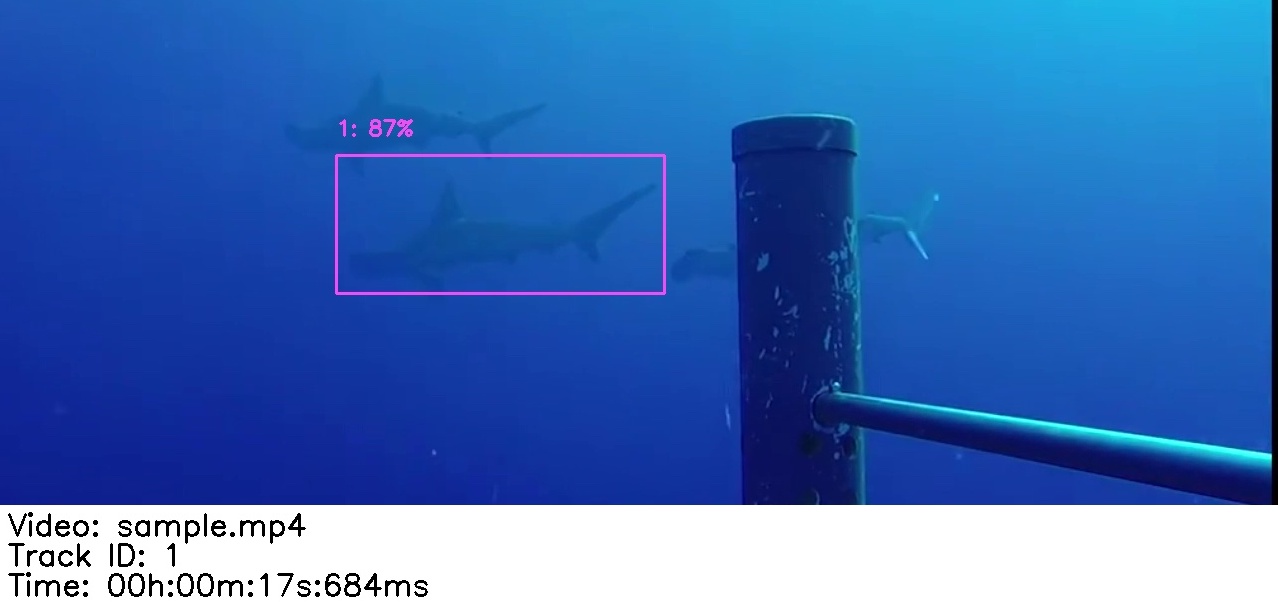
The screenshot also shows the source video file and timestamp, so you can refer back to the original footage when unsure.
You may see multiple animals in the frame, but SharkTrack saves one screenshot per track, only one bounding box. Focus on the animal in the box.
Step 1: Review (clean + label)
- Open each video’s output subfolder. It contains files named
{track_id}.jpg. - Scroll through the images and focus on the animal inside the bounding box.
- If it’s not a shark/ray, delete the file.
- If it is, rename
{track_id}.jpg→{track_id}-{species}.jpg.
Example: 5.jpg → 5-great_hammerhead.jpg
Keep the original
track_idnumber at the start of the filename. The MaxN script uses it to match your label back to the track.
The
{species}part can be any text. For consistency, prefer lowercase with underscores (scalloped_hammerhead,manta_ray,unknown).
FAQ
What is a track?
The same elasmobranch appears across many consecutive frames. A track is SharkTrack’s “this is the same animal I saw before” group, with an ID.
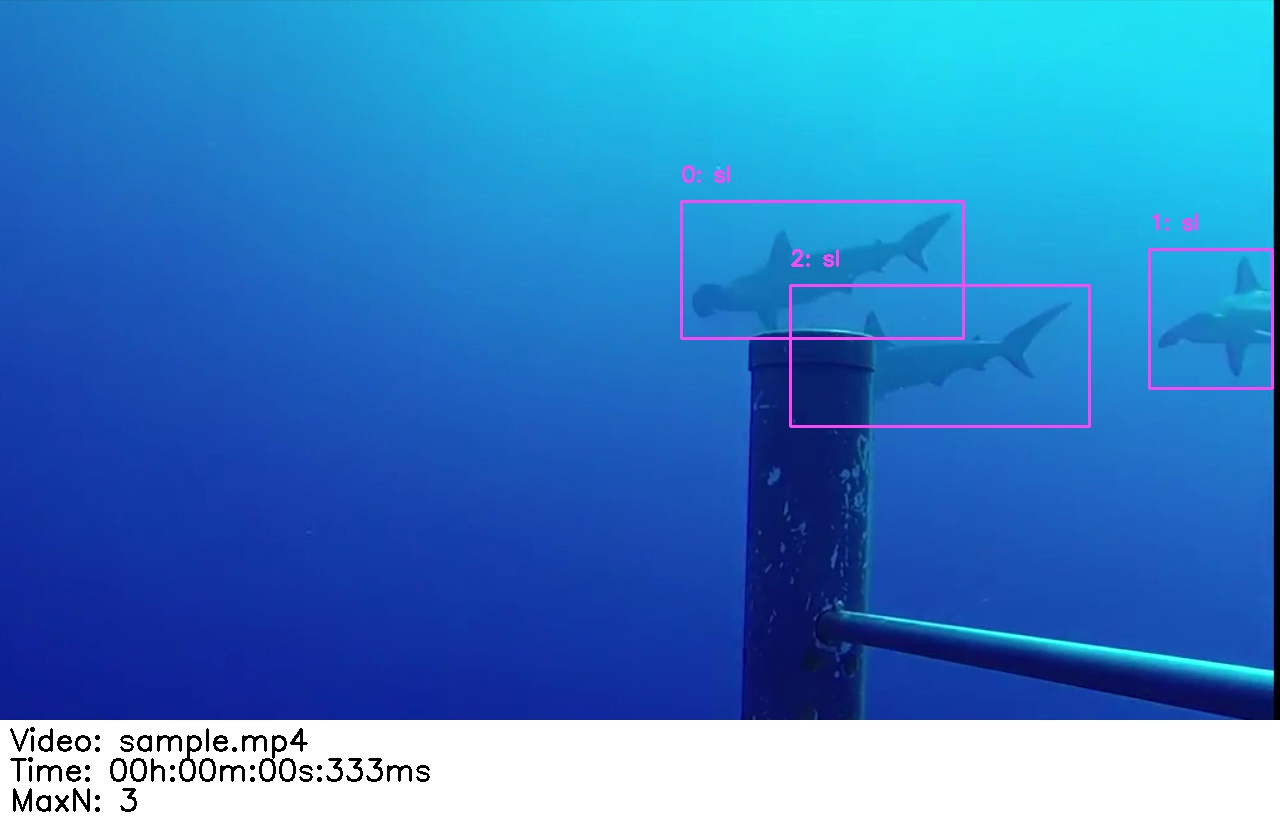
Why are there multiple animals in the screenshot but only one bounding box?
SharkTrack saves one screenshot per track, so you’ll always see only one bounding box. Only label the animal in the box.
Why does this matter?
You only label one screenshot per track instead of thousands of frames. The script applies your label to all detections in that track when computing MaxN.
One frame isn’t enough to determine species
Each detection image shows the video name/path and timestamp, so you can go back to the original video to confirm species.
I see the same elasmobranch in multiple detections
The model sometimes splits the same shark into two or more consecutive tracks. Classify all of them, it won’t hurt MaxN accuracy, just adds a bit of work.
Pro tips
- Do a first pass to remove wrong detections, then assign species labels in a second pass.
- Unsure about species or validity? Check the bottom of the detection image for video name + timestamp, then revisit the original video.
- Windows shortcuts:
F2to rename,Ctrl+Dto delete. - macOS shortcuts: Gallery view,
Cmd+Deleteto remove,Enterto rename.
Collaborating
Want multiple users to annotate? Upload the entire output folder to Google Drive, Dropbox or OneDrive and clean it there.
Step 2: Compute MaxN
Once you’ve reviewed all track screenshots, generate MaxN:
-
Open the terminal in the
sharktrackfolder (same as in the User Guide). -
Activate the virtual environment:
Anaconda
conda activate sharktrackWindows
venv\Scripts\activate.batmacOS / Linux
source venv/bin/activate -
Run the MaxN computation:
python utils/compute_maxn.py
You’ll be asked for:
- the path to your output folder (the one you just reviewed)
- the path to the folder containing the original videos (optional, used to compute visualisations)
A new folder called
analysedwill be created, containingmaxn.csvand subfolders with MaxN visualisations per video.
If a result looks off, head back to Step 1 and double-check the track screenshots for that video, especially borderline false positives.
Need help?
- Issues: submit on GitHub
- Questions: email us
- Contributions: PRs, issues and ideas welcome, over email